A useful handyman task list is more than a collection of things that look unfinished. It gives a service provider enough context to understand the work, group related tasks, identify questions, and prepare for an efficient first visit. The best list is organized around the home rather than around a shopping trip or a set of guessed solutions.
Walk Through One Area at a Time
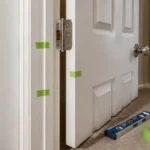
Start with a room-by-room walk-through. Use simple headings such as kitchen, main bathroom, front entry, garage, or exterior. Under each heading, describe one task per line. “Bedroom door rubs at the top corner” is more useful than “fix doors” because it identifies both the location and the visible condition.
Record what you can observe without taking anything apart. Note whether an item is loose, cracked, missing, difficult to operate, or no longer aligned. If the concern changes during normal use, describe when that happens. A drawer that binds only when fully loaded and a door that sticks after humid weather may need different evaluation than parts that never move correctly.
Add Priority Without Diagnosing the Repair
Give every task a practical priority. An item affecting safe access, active water intrusion, or a component that may fall should be called out promptly and may need a specialist rather than routine handyman work. Tasks that interfere with daily use can come next. Cosmetic touchups and optional improvements can remain in a later group.
Avoid prescribing a repair unless the cause is already known. “Replace hinge” can hide a problem with the door, frame, fasteners, or alignment. Describe the symptom first and let the on-site findings determine the appropriate work. This keeps the request accurate and prevents an assumed solution from becoming an unintended promise.
Include Measurements and Product Information
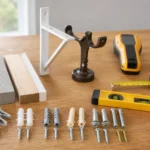
Measurements help with early planning when they are labeled clearly. State what each number represents and where it was taken. For an accessory installation, record the product model, overall dimensions, mounting instructions, nearby clearance, and the material of the mounting surface if known. Photographs of labels or instruction sheets can be useful, but do not remove covers or disturb wiring, plumbing, or concealed fasteners to obtain them.
If a replacement product has already been purchased, note that fact and keep all included parts together. Compatibility still needs to be confirmed. Dimensions alone do not show whether the wall has suitable support, whether connections match, or whether the manufacturer calls for a particular mounting method.
Make the List Easy to Review
Number the tasks and attach photographs using the same numbers. Include one wider image that establishes the location and a closer image of the visible condition when both can be taken safely. Mention access constraints such as heavy furniture, occupied rooms, pets, high ceilings, or limited working space.
Before sending the list, remove duplicates and separate unrelated projects. Ten precise tasks are easier to assess than several versions of the same concern. Keep the original list after the visit, then add agreed scope notes beside each item. It becomes a useful project record without pretending that every observation has already been diagnosed.